Submitted by Nicole L’Etoile, CPACC
For years, I created slides, infographics, and PDFs using tools that produced clean, professional visuals. They looked great. They felt easy. And they had just enough “accessibility-friendly” messaging to make me think I was on the right track.
But as my work deepened in accessibility, especially supporting organizations with Web Content Accessibility Guidelines (WCAG), content audits, and ADA Title II preparation, I started seeing cracks.
Tools that looked accessible weren’t actually producing accessible PDFs. Tagging was inconsistent. Reading order was unreliable. Headings weren’t marked properly, and color contrast tools were missing. That gap mattered, especially because if I’m going to teach accessibility, my own workflow has to reflect what I teach.
Sometime in 2024, I can’t recall exactly when, Eugene Woo, the CEO of Venngage, reached out to me through LinkedIn and offered me a chance to try their tool. It was the first time I had been given access to a design platform at no cost, and I went into it with the same mindset I apply to any accessibility tool: cautious, curious, and ready to test it thoroughly.
What I found is that Venngage is a tool that actually does the things I wish other tools did.
But I want to be transparent and let you know up front that the purpose of this blog post isn’t to sell Venngage. It’s to demonstrate the kinds of features and workflows that any design tool must have if you expect it to produce accessible PDFs.
You can use Venngage. You can use something else. But the tool you choose must support accessibility beyond appearance, beyond branding, and beyond “good enough.”
This article lays out the process I follow and the exact accessibility features I look for, using Venngage as the example because it's the tool that demonstrated all of these elements clearly and consistently.
What an Accessibility-Centered Tool Needs to Do
Before I walk through my workflow, I want to surface that most design software focuses on visuals first and accessibility last, if at all. A tool meant for accessible PDF creation should include:
- A clear, practical workflow for alt text: Including default decorative marking for icons and shapes, and the ability to reveal alt text across a project.
- Color contrast tools that match WCAG: Live feedback while choosing colors, not a separate step, it’s right there while you are designing!
- Visibility into the tag tree and reading order: If I can’t inspect and manually correct the reading order, I can’t trust the PDF.
- A built-in accessibility checker: Not a generic one or AI version. A tool that tells you what needs attention and where human judgment is required.
- Actual PDF tagging: Not “Adobe will fix it later.” Not “Looks fine visually.” But semantic tags that stayed tags after downloading the PDF: headings, lists, reading order, alt text, tables, and document language.
Venngage meets these requirements, which is why I use it. While the examples in this post use slides for presentations, the same accessibility tools and approach applies across templates and design types within the tool.
My Step-by-Step Process for Creating Accessible PDFs
Below is my workflow, the same one I use for training, client work, and ADA Title II preparation.
Step 1: Start with the Accessibility Panel
The first thing I do once I have my content laid out and where I want it is open the Accessibility Panel, which is easily located in the File tab.
A strong accessibility panel should include:
- Tag order
- Alt text visibility
- Document language
- Accessibility check
- Visual simulators

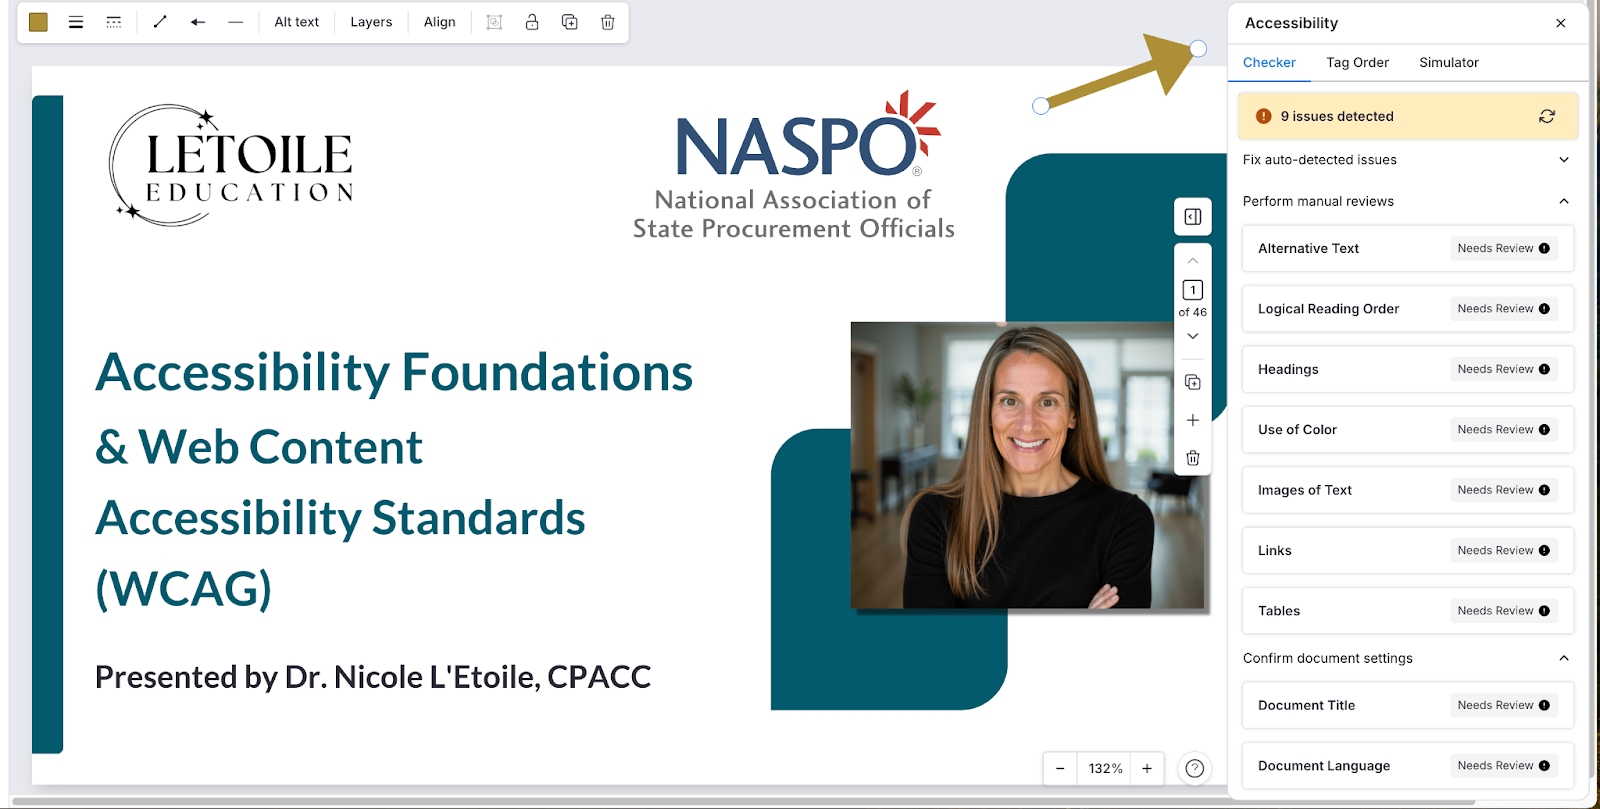
Step 2: Run the Accessibility Check
A meaningful checker doesn’t tell you everything is fixable. It tells you:
- What issues were detected
- What needs human review
- Where structure is broken
And, it gives you the opportunity to fix it before exporting to PDF.
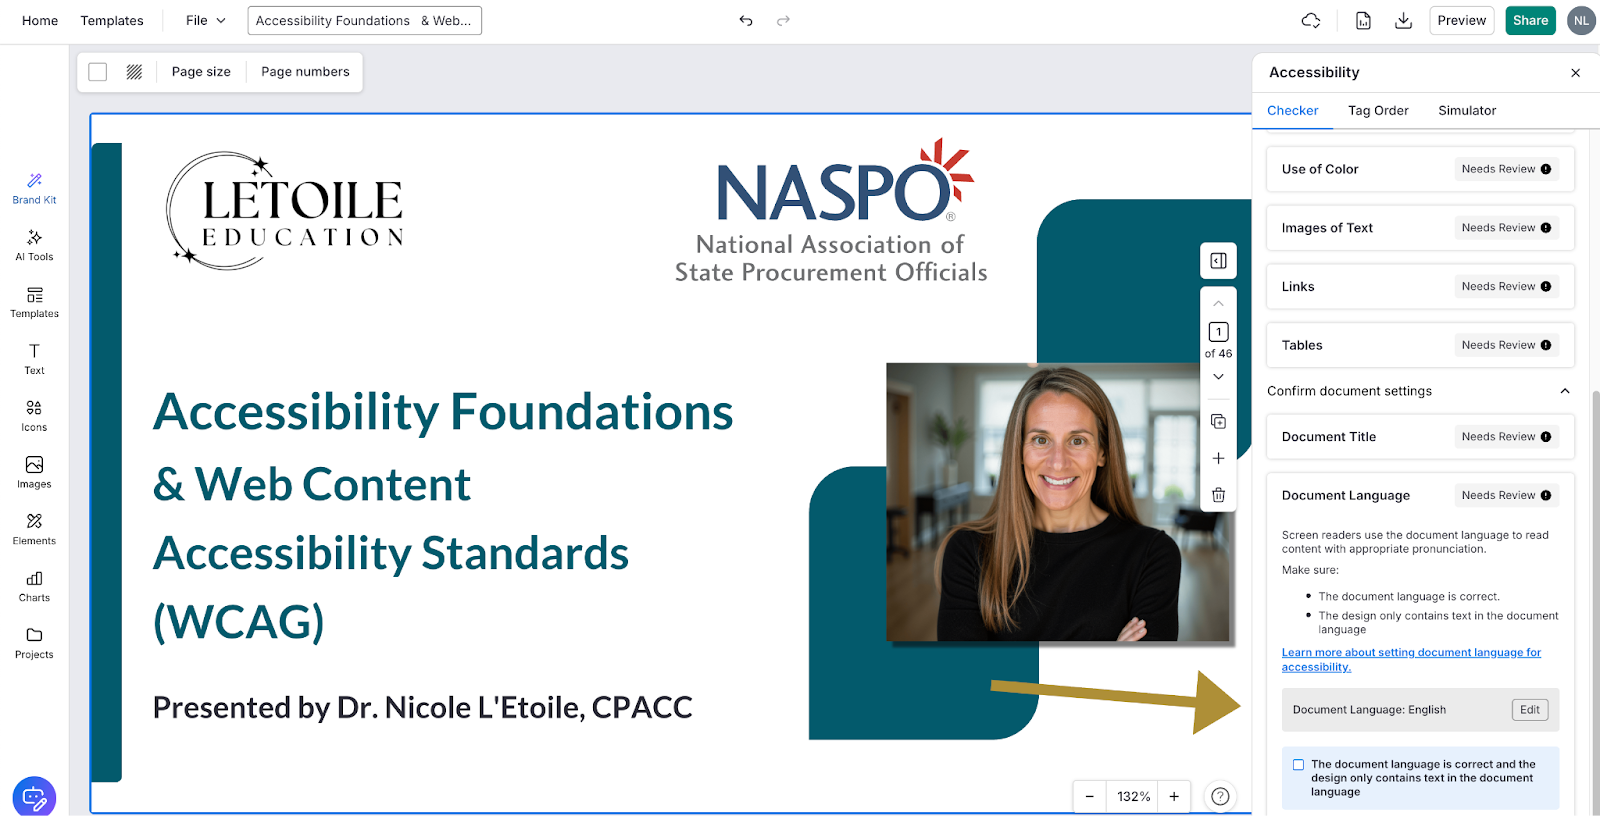
Step 3: Set Document Language
This is a simple step that should never be hidden.
Correct language improves pronunciation, navigation, and comprehension for screen reader users.
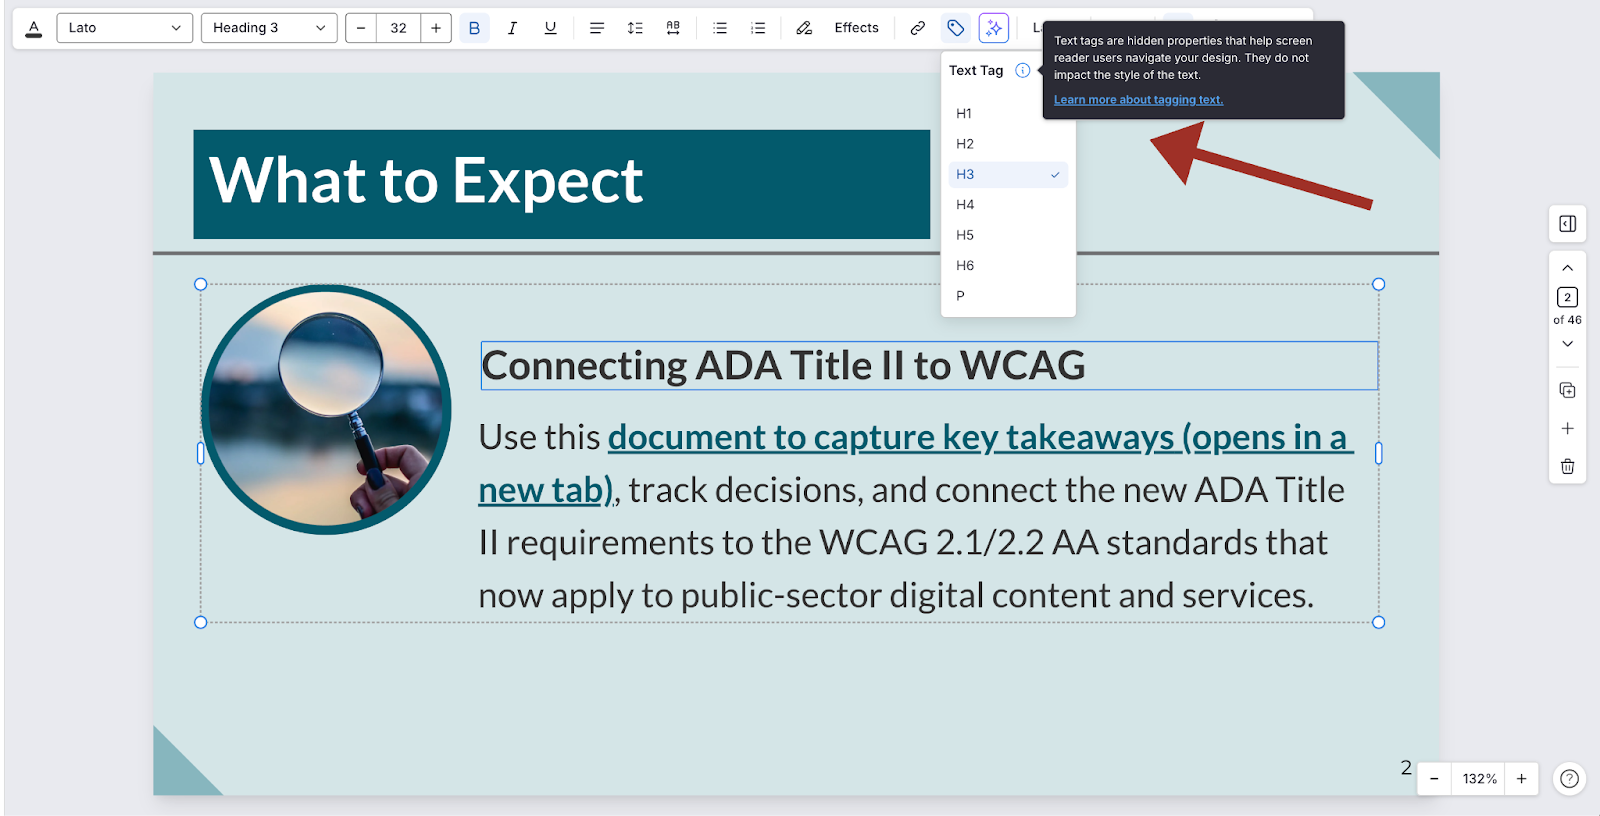
Step 4: Apply Heading Tags
A design tool should let you assign:
- H1 (title)
- H2 (section headers)
- H3–H6 (sub-headers)
- Paragraph text
Step 5: Write Alt Text As You Build
A tool should allow you to:
- Add alt text to meaningful images
- Leave decorative items untagged
- Quickly check alt text across the entire project
If you have to retrofit this in Acrobat, the tool isn’t supporting accessibility well.
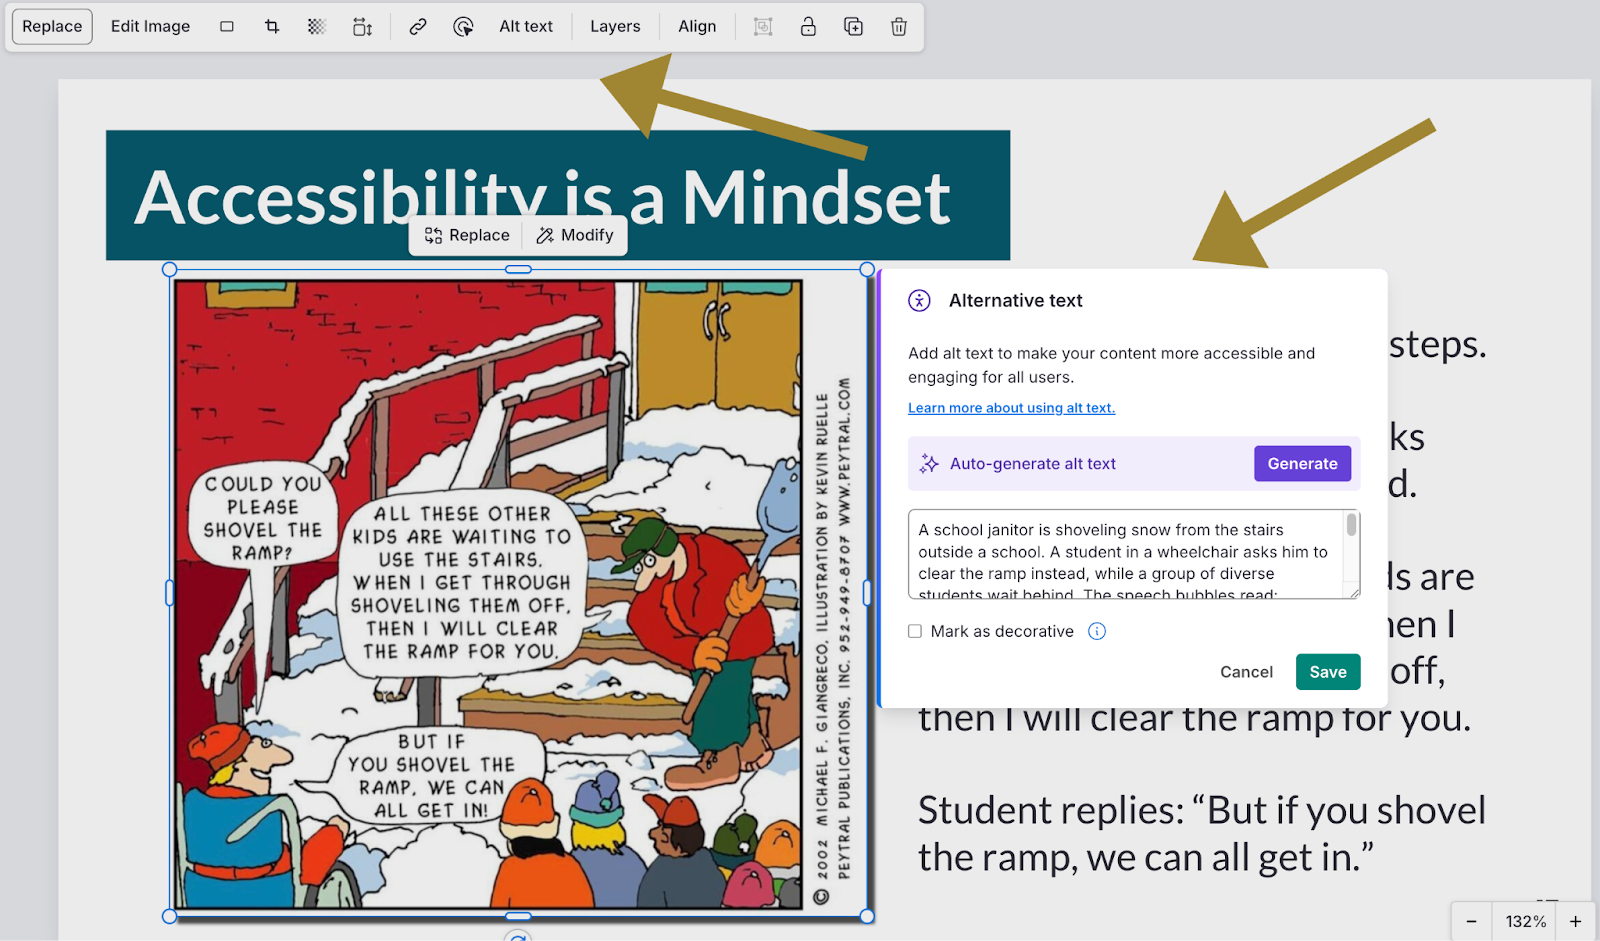
Many tools now offer AI-generated alt text as a built-in feature. In my experience, this is worth trying, but it’s not something I rely on without review.
About 9 times out of 10, I find myself revising or editing what the AI produces to better match the purpose of the image and the surrounding content. That said, it can be a useful starting point. I appreciate not having to leave the tool to generate alt text elsewhere and then copy, paste, and edit it back in.
When used thoughtfully and followed by human judgment, it can save a step in the workflow, but it does not replace the need for intentional, well-written alt text.
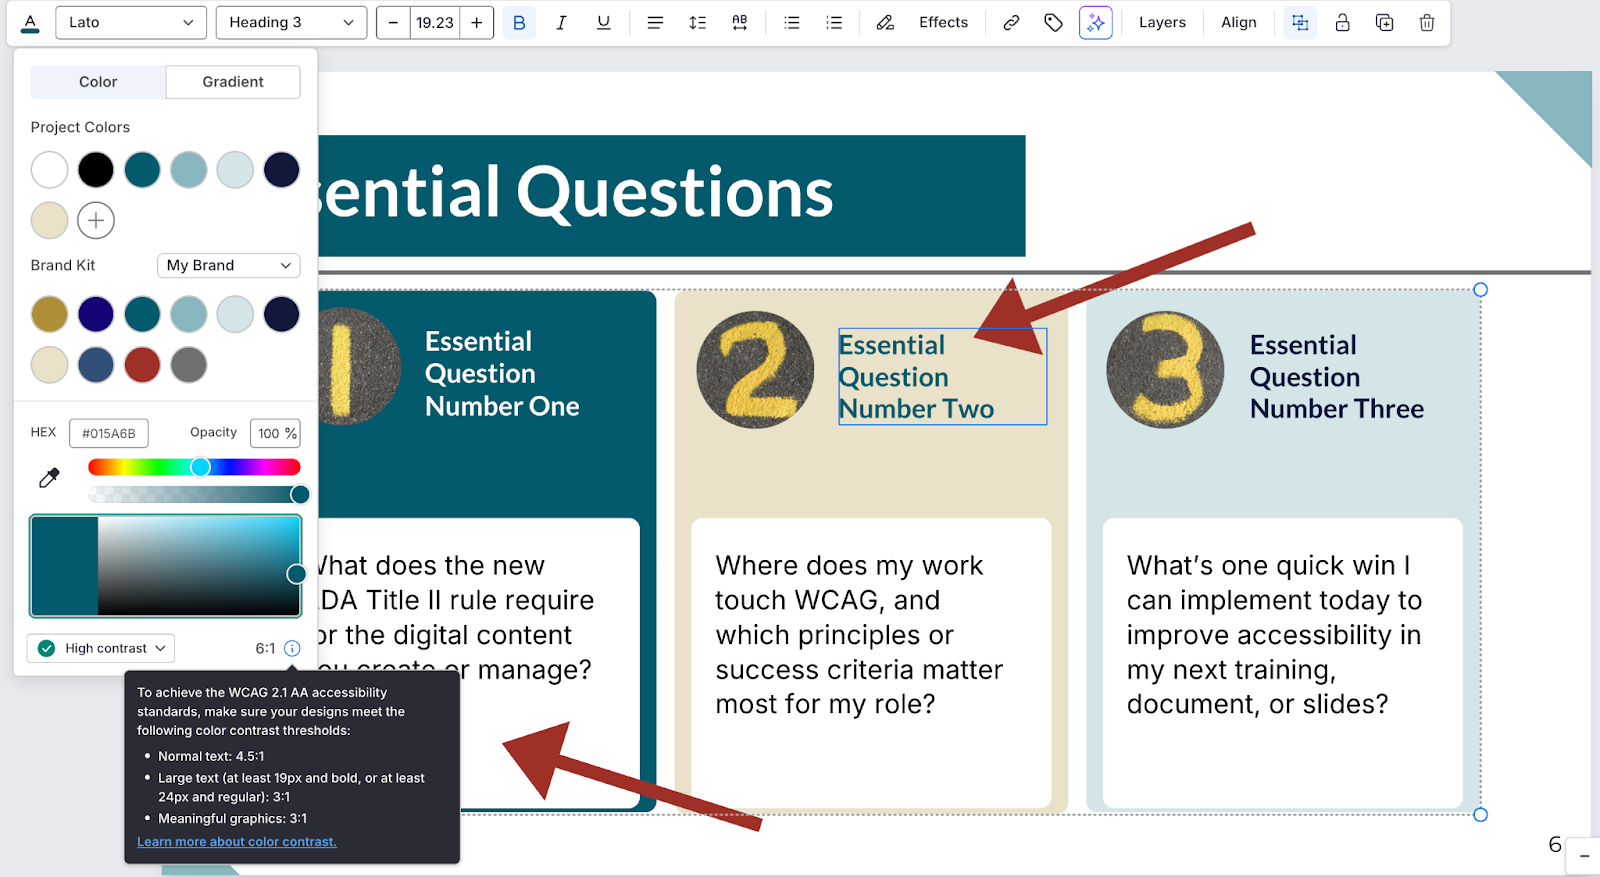
Step 6: Check Color Contrast
The contrast checker should:
- Display live ratios
- Flag failures
- Help you adjust colors
- Support WCAG AA requirements
You shouldn't need a separate website or tool to test every color.
Step 7: Preview with Vision Simulators
A useful tool will let you preview the PDF through different color simulators to check for contrast and color combinations that are still visible to individuals with colorblindness.
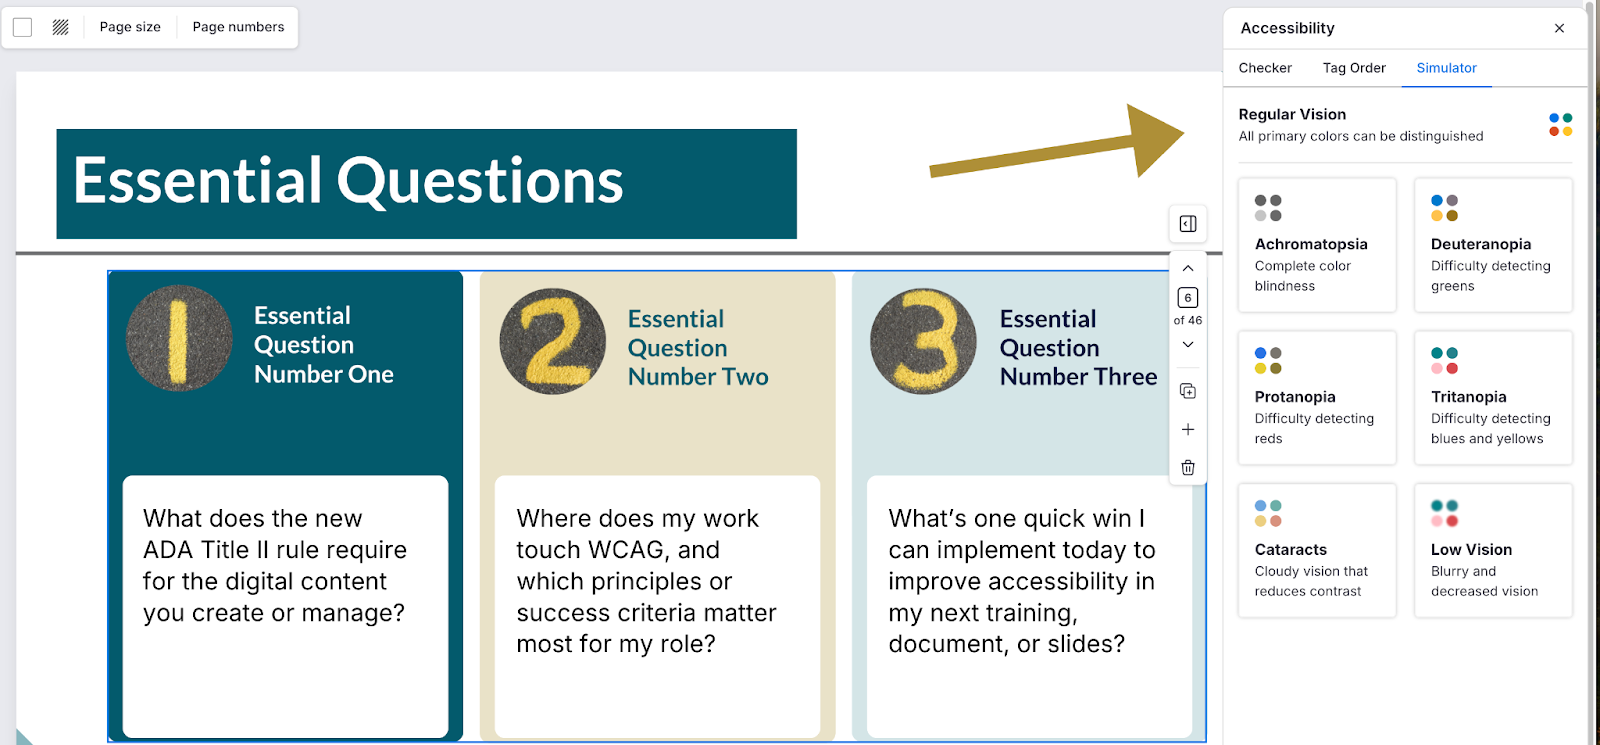
Included in this simulator is the following:
- Achromatopsia: complete color blindness
- Deuteranopia: difficulty detecting greens
- Protanopia: difficulty detecting reds
- Tritanopia: difficulty detecting blues and yellows
- Cataracts: cloudy vision that reduces contrast
- Low Vision: blurry and decreased vision
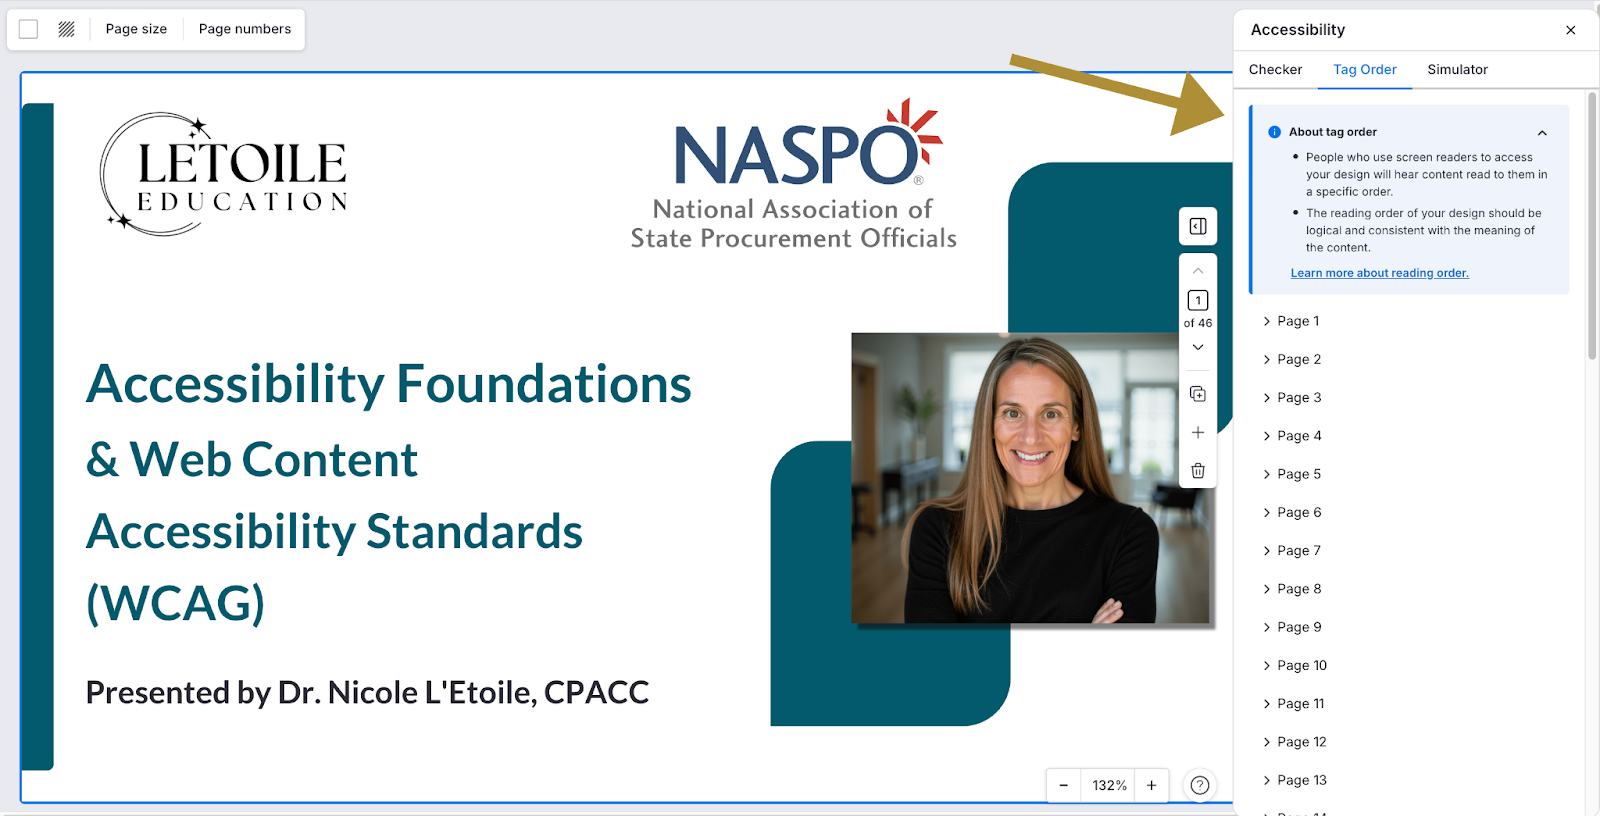
Step 8: Review the Tag Order
This is make-or-break.
Your tool MUST allow you to:
- Inspect tag order
- Rearrange elements
- Confirm proper nesting
- Remove decorative items from the reading order
If you can’t see or fix the tag order, the exported PDF will not be accessible.
Step 9: Export a Tagged PDF
A trustworthy tool will export:
- Tagged headings
- Correct reading order
- Alt text
- Accessible tables
- Navigable structure
- Accurate language settings
When I test PDFs created through this workflow using a screen reader, they behave correctly, consistently.
Why I’m Sharing This
When Venngage first offered me access to their platform, I had no expectation that I’d ever write about it. I didn’t expect to be invited onto their podcast, or to later return as a panel speaker alongside Sarah Mercier and Leah Roman to talk about digital accessibility.
I didn’t expect to prefer the tool. I didn’t expect to rave about it. And I definitely didn’t expect it to become my primary tool for slides, infographics, and PDFs. But that’s exactly what happened.
More recently, Sarah reached out as I’ve been spending a lot of time working with organizations on PDF accessibility and pushing a conversation that’s long overdue: sunsetting and archiving content that isn’t worth keeping, and rebuilding what actually matters with accessibility built in from the start.
But this article isn’t just about Venngage.
It’s about showing what an accessibility-first workflow actually looks like, and the features you should expect from any tool you use.
Use Venngage. Use something else. Use whatever fits your workflow and your team. Just don’t settle for tools that look accessible but fall apart where it counts. And lastly, don’t forget to test it with a screen reader once you export to PDF. This is the true test!
Accessible PDFs depend on structure, tagging, and transparency.
My hope is that this walkthrough gives you a model to follow and a standard to hold your tools to. Because once you know what to look for, “good enough” stops being good enough. Accessibility is a skill, a practice, and a mindset, and it gets stronger when you learn it in community. If you want to improve your accessibility workflows, I share practical guidance, examples, and lessons learned about accessibility and learning design on LinkedIn.
You can also join the next cohort of Making Online Content Accessible for All, where we move beyond “good enough”as a community, and focus on building content that works for as many people as possible.
Creating Accessible PDFs: Why I Moved Beyond “Good Enough” and What I Look for in a Tool
This article lays out the process Nicole L'Etoile follows and the exact accessibility features to look for, using Venngage as the example because it's the tool that demonstrated all of these elements clearly and consistently.